ubuntu development environment dockerfile
- docker
- docker-toolbox for Mac OSX users: brew cask install docker-toolbox
For China users, it's better to create docker machine with registry mirror. Refer to aliyun Create Linux virtual machine:
# ubuntu is not supported by docker-machine
#<!--docker-machine create -d virtualbox --engine-registry-mirror=http://mirror-site --virtualbox-boot2docker-url ~/Downloads/ubuntu-17.04-desktop-amd64.iso ubuntu-->

docker-machine create -d virtualbox --engine-registry-mirror=https://kekmbrvt.mirror.aliyuncs.com --virtualbox-boot2docker-url https://github.com/Alexoner/boot2docker/releases/download/v17.06.0-ce-usb-rc5/boot2docker.iso defaultdocker build -t dev .Or, customize build modules:
docker build \
	--build-arg SETUP_MIRROR=true \
	--build-arg INSTALL_MODULES="shell python vim shadowsocks ml opencv dev ops" \
	-t dev .
	```

# Run

## Basic Run

--previleged: gives all capabilities to the container, such as iptables
-d:           Launch the container in detach mode.
-t:           terminal
-i:           interactive
--net="host": With the network set to host a container will share the host’s network stack and all interfaces
from the host will be available to the container. The container’s hostname will match the hostname on the
host system.
```shell
docker run --privileged -v $HOME:/Users --net="host" -dti <image> bash
This command will mount the current user's HOME directory on /opt in docker container.
For Linux:
#!/bin/bash
xhost +local:
docker run -it \
  --net=host \
  --user=$(id -u) \
  -e DISPLAY=$DISPLAY \
  -e QT_GRAPHICSSYSTEM=native \
  -e CONTAINER_NAME=ros-kinetic-dev \
  -e USER=$USER \
  --workdir=/home/$USER \
  -v "/tmp/.X11-unix:/tmp/.X11-unix" \
  -v "/etc/group:/etc/group:ro" \
  -v "/etc/passwd:/etc/passwd:ro" \
  -v "/etc/shadow:/etc/shadow:ro" \
  -v "/etc/sudoers.d:/etc/sudoers.d:ro" \
  -v "/home/$USER/:/home/$USER/" \
  --device=/dev/dri:/dev/dri \
  --name=ubuntu-dev \
ubuntu:devRun bash with:
docker exec -u root -ti ID_of_container zshif you are using docker.io ( dockerhub repo ), you need to tag it including the name docker.io in it.
docker tag ${image_id} docker.io/${login_name}/${image_name} and then
docker push docker.io/${login_name}/${image_name}XQuartz
brew cask install xquartzXQuartz 2.7.9, which is the current one provided by brew, has a bug which will prevent you from following this guide. So, head on over and download XQuartz 2.7.10 beta 2 from here.
open -a XQuartzIn the XQuartz preferences, go to the “Security” tab and make sure you’ve got “Allow connections from network clients” ticked:
Indirect GLX is no longer supported by default. You can enable it with:
defaults write org.macosforge.xquartz.X11 enable_iglx -bool trueAgain, in e.g. bash, run xhost and allow connections from your local machine:
ip=$(ifconfig en0 | grep inet | awk '$1=="inet" {print $2}')
xhost + $ip
You can now to run GUI programs from docker container, e.g. Jessie Frazelle’s Firefox container:
docker run -itd --name firefox -e DISPLAY=$ip:0 -v /tmp/.X11-unix:/tmp/.X11-unix jess/firefoxHowever, this method doesn't seem to work on OSX capitan, refer to the next method
After running XQuartz correcty, you should see variable DISPLAY set:
Alex@Alexs-MacBook-Pro ➜  ~ echo $DISPLAY
/private/tmp/com.apple.launchd.s7M0xvgpTe/org.macosforge.xquartz:0
Socat is a command line based utility that establishes two bidirectional byte streams and transfers data between them, and XQuartz - Apples version of the X server:
ip=$(ifconfig en0 | grep inet | awk '$1=="inet" {print $2}')
socat TCP-LISTEN:6000,reuseaddr,fork UNIX-CLIENT:\"$DISPLAY\"
In theory, you should see such result:
Alex@Alexs-MacBook-Pro ➜  ~ ps aux |grep -i xquartz |grep -v grep
Alex             10468   0.0  0.0  2468388     12 s042  SN   Tue06PM   0:00.06 socat TCP-LISTEN:6000,reuseaddr,fork UNIX-CLIENT:"/private/tmp/com.apple.launchd.s7M0xvgpTe/org.macosforge.xquartz:0"
Then, start the container:
# docker run -dit --name firefox -e DISPLAY=$ip:0 -v /tmp/.X11-unix:/tmp/.X11-unix jess/firefox
# docker run -d --name firefox -e DISPLAY=$ip:0 jess/firefox

docker run --privileged -it --rm -v $HOME:/Users -e DISPLAY=30.5.52.4:0 onerhao/dev:cv zshRun the docker image and open port 6080
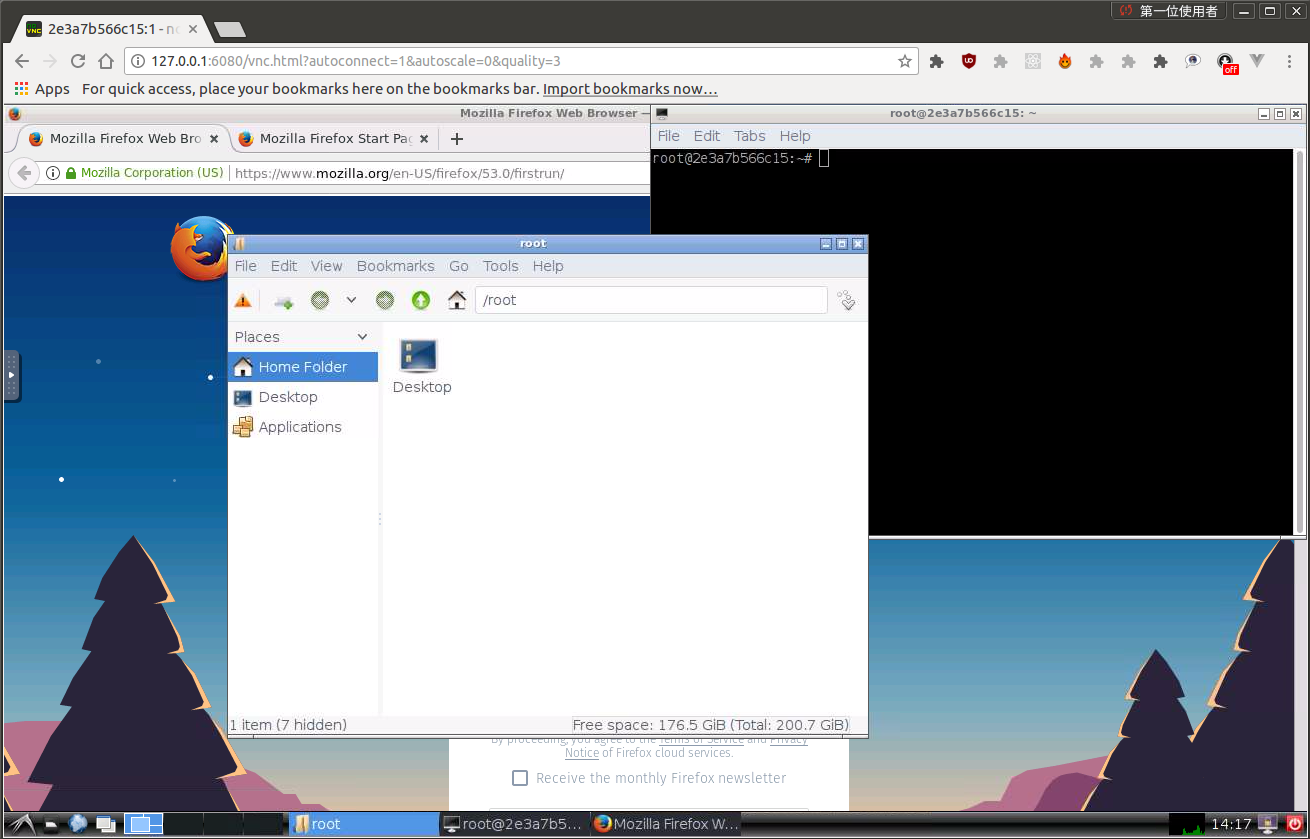
docker run -it --privileged -v $HOME:/Users --rm -p 6080:80 onerhao/ubuntu-desktop-lxde-vnc
Browse http://127.0.0.1:6080/
Forward VNC service port 5900 to host by
docker run -it --rm -p 6080:80 -p 5900:5900 onerhao/ubuntu-desktop-lxde-vnc
Now, open the vnc viewer and connect to port 5900. If you would like to protect vnc service by password, set environment variable VNC_PASSWORD, for example
docker run -it --rm -p 6080:80 -p 5900:5900 -e VNC_PASSWORD=password onerhao/ubuntu-desktop-lxde-vnc
A prompt will ask password either in the browser or vnc viewer.
- boot2docker connection issue, fcwu/docker-ubuntu-vnc-desktop#2
With Linux host, we can map device directly to access the device. However, with Mac OSX host, the file system is not the same with Linux, some device files are just not there, such as /dev/video0. And Mac OSX's FaceTime HD Camera is an emulated USB device.
To wrap it up, in order to access Mac OSX' webcam, we these requirements must be met:
- USB controller(USB 2.0 EHCI controller) is enabled on the virtual machine
- Device is attached to the container
- Device driver functions well
- Device files are created(in general, this is managed by the driver)
If everything goes on well, we should see the following message when we attach/plug in the device (Facetime webcam).
alex@alex-VirtualBox:~$ dmesg |tail
[  477.428133] usb 2-2: new full-speed USB device number 3 using ohci-pci
[  477.776552] usb 2-2: New USB device found, idVendor=80ee, idProduct=0030
[  477.776554] usb 2-2: New USB device strings: Mfr=1, Product=2, SerialNumber=3
[  477.776556] usb 2-2: Product: VirtualBox Webcam - FaceTime HD Camera
[  477.776557] usb 2-2: Manufacturer: VirtualBox
[  477.776558] usb 2-2: SerialNumber: CC26446VRRRG1HNBK
[  477.857271] media: Linux media interface: v0.10
[  477.866278] Linux video capture interface: v2.00
[  477.884183] uvcvideo: Found UVC 1.00 device VirtualBox Webcam - FaceTime HD Camera (80ee:0030)
[  477.915147] uvcvideo 2-2:1.0: Entity type for entity Processing 2 was not initialized!
[  477.915150] uvcvideo 2-2:1.0: Entity type for entity Camera 1 was not initialized!
[  477.915337] input: VirtualBox Webcam - FaceTime HD as /devices/pci0000:00/0000:00:06.0/usb2/2-2/2-2:1.0/input/input8
[  477.915545] usbcore: registered new interface driver uvcvideo
[  477.915546] USB Video Class driver (1.1.1)

alex@alex-VirtualBox:~$ lsusb
Bus 001 Device 001: ID 1d6b:0002 Linux Foundation 2.0 root hub
Bus 002 Device 003: ID 80ee:0030 VirtualBox
Bus 002 Device 002: ID 80ee:0021 VirtualBox USB Tablet
Bus 002 Device 001: ID 1d6b:0001 Linux Foundation 1.1 root hub

alex@alex-VirtualBox:~$ ls -lh /dev/video*
crw-rw----+ 1 root video 81, 0 6月  23 09:40 /dev/video0
Here, we can see that the Linux kernel detected new device plugged in, and inserted corresponding module uvcvideo.ko, and the created the device file
SKIP THIS IF NOT INTERESTED IN THE DETAIL!
- Method 1: using usbutils
$ usb-devices
... ...
T:  Bus=02 Lev=01 Prnt=01 Port=01 Cnt=02 Dev#=  3 Spd=12  MxCh= 0
D:  Ver= 2.00 Cls=ef(misc ) Sub=02 Prot=01 MxPS=16 #Cfgs=  1
P:  Vendor=80ee ProdID=0030 Rev=01.00
S:  Manufacturer=VirtualBox
S:  Product=VirtualBox Webcam - FaceTime HD Camera
S:  SerialNumber=CC26446VRRRG1HNBK
C:  #Ifs= 2 Cfg#= 1 Atr=80 MxPwr=500mA
I:  If#= 0 Alt= 0 #EPs= 1 Cls=0e(video) Sub=01 Prot=00 Driver=uvcvideo
I:  If#= 1 Alt= 0 #EPs= 1 Cls=0e(video) Sub=02 Prot=00 Driver=uvcvideo
Here, we are using uvcvideo driver for FaceTime HD Camera, which is a emulated USB device.
- Method 2: lsusb -t
alex@alex-VirtualBox:~$ lsusb -t
/:  Bus 02.Port 1: Dev 1, Class=root_hub, Driver=ohci-pci/12p, 12M
    |__ Port 1: Dev 2, If 0, Class=Human Interface Device, Driver=usbhid, 12M
    |__ Port 2: Dev 4, If 0, Class=Video, Driver=uvcvideo, 12M
    |__ Port 2: Dev 4, If 1, Class=Video, Driver=uvcvideo, 12M
/:  Bus 01.Port 1: Dev 1, Class=root_hub, Driver=ehci-pci/12p, 480M
-
Method 3: dmesg |grep driver |tail
-
Method 4: general
sysfsinformation for device file Inspect the device type, major/minor number:
alex@alex-VirtualBox:~$ ls -lh /dev/video*
crw-rw----+ 1 root video 81, 0 6月  23 10:05 /dev/video0
This is a character device, major/minor is 81/0.
The look char directory under /sys/dev, which contains information of
character devices.
alex@alex-VirtualBox:~$ readlink /sys/dev/char/81\:0/device/driver
../../../../../../bus/usb/drivers/uvcvideo- Method 5: udevadm
udevadm info -a -n /dev/sda | grep -oP 'DRIVERS?=="\K[^"]+' Find find the driver's information:
alex@alex-VirtualBox:~$ modinfo uvcvideo |grep ko
filename: /lib/modules/4.10.0-19-generic/kernel/drivers/media/usb/uvc/uvcvideo.koRefer to: https://www.virtualbox.org/manual/ch09.html#webcam-passthrough
Install VirtualBox Extension Pack.
In VirtualBox VM interface, use the Devices menu to attach the desired webcam.
Or you can attach the webcam with command line:
# VBoxManage controlvm "VM name" webcam attach [host_path|alias [settings]]
# VBoxManage controlvm "VM name" webcam detach [host_path|alias]

# find which camera is available on the laptop.
$ VBoxManage list webcams
# -- the following is the output
Video Input Devices: 1
.1 "FaceTime HD Camera"
CC26446VRRRG1HNBK
# -- expected output
# alias "user friendly name"
# host path or identifier
#Note: OS X Yosemite does not provide host path..

# Now that we know that we have webcam "Alias"->.1 and the "VM name"->"Win7 Ultimate" we can now get webcam to work in VBox.
# Attach the webcam
$ VBoxManage controlvm 'default' webcam attach .1

# If you want to detach it from the virtual machine
$ VBoxManage controlvm 'default' webcam detach .1

# see which camera is used by VirtualBox then
$ VBoxManage controlvm "default" webcam list
CC26446VRRRG1HNBK

$ VBoxManage list vms
"Win7 Ultimate" {4e10f9fa-7eea-4583-b1f9-3f46cd132f28}
"ubuntu" {914b6653-48ab-4e6e-9c04-bdffcdee5392}
"work" {cd082413-6283-4d83-bdd6-080291916050}
"default" {e6625219-6962-47c4-a5c0-6d826aabca1a}
THIS WILL NOT WORK, because the kernel version mismatch.
For install the webcam driver for docker-machine
docker-machine ssh docker-machine
tce-load -w -i v4l-dvb-4.2.7-tinycore64.tcz
exit
Default boot2docker.iso is compiled from source, and based on tinycorelinux. After compilation, it's not easy to use tce-load to install extensions.
unsquashfs APP.tcz
Install v4l-dvb by hand, e.g. tce-load -i v4l-dvb-4.2.9-tinycore64.tcz Go to the /tmp/tce/optional/ folder and make a copy or link the v4l-dvb-4.2.9-tinycore64.tcz[.md5.txt] files to v4l-dvb-4.4.39-boot2docker.tcz[.md5.txt]
This is maintain in a boot2docker repository.
SKIP FOLLOWING IF NOT INTERESTED.
Checkout boot2docker is currently built
To enable webcams, V4L, UVC, video, we need to change the kernel config:
CONFIG_MEDIA_SUPPORT:

If you want to use Webcams, Video grabber devices and/or TV devices
enable this option and other options below. Additional info and docs
are available on the web at http://linuxtv.org

Symbol: MEDIA_SUPPORT [=m]
Type  : tristate
Prompt: Multimedia support
  Defined at drivers/media/Kconfig:5
  Depends on: HAS_IOMEM [=y]
  Location:
    -> Device Drivers
CONFIG_MEDIA_CAMERA_SUPPORT:

Enable support for webcams and video grabbers.

Say Y when you have a webcam or a video capture grabber board.

Symbol: MEDIA_CAMERA_SUPPORT [=y]
Type  : boolean
Prompt: Cameras/video grabbers support
  Defined at drivers/media/Kconfig:21
  Depends on: MEDIA_SUPPORT [=m]
  Location:
    -> Device Drivers
      -> Multimedia support (MEDIA_SUPPORT [=m])
CONFIG_MEDIA_USB_SUPPORT:

Enable media drivers for USB bus.
If you have such devices, say Y.

Symbol: MEDIA_USB_SUPPORT [=y]
Type  : boolean
Prompt: Media USB Adapters
  Defined at drivers/media/usb/Kconfig:1
  Depends on: USB [=y] && MEDIA_SUPPORT [=m]
  Location:
    -> Device Drivers
      -> Multimedia support (MEDIA_SUPPORT [=m])
CONFIG_USB_VIDEO_CLASS:

Support for the USB Video Class (UVC).  Currently only video
input devices, such as webcams, are supported.
For more information see:

Symbol: USB_VIDEO_CLASS [=m]
Type  : tristate
Prompt: USB Video Class (UVC)
  Defined at drivers/media/usb/uvc/Kconfig:1
  Depends on: MEDIA_SUPPORT [=m] && MEDIA_USB_SUPPORT [=y] && MEDIA_CAMERA_SUPPORT [=y]
  Location:
    -> Device Drivers
      -> Multimedia support (MEDIA_SUPPORT [=m])
        -> Media USB Adapters (MEDIA_USB_SUPPORT [=y])
  Selects: VIDEOBUF2_VMALLOC [=n]
That is, in the kernel config, enable as appropriate in:
Device Drivers (Multimedia support) Device Drivers -> Multimedia support Device Drivers -> Multimedia support -> Media USB Adapters
docker-machine create -d virtualbox \
	--virtualbox-boot2docker-url https://github.com/Alexoner/boot2docker/releases/download/v17.06.0-ce-usb-rc5/boot2docker.iso \
	--engine-registry-mirror=https://kekmbrvt.mirror.aliyuncs.com \
default# OSX
ffmpeg -f avfoundation -list_devices true -i ""
ffmpeg -f avfoundation -r 30.0000 -s 640x480 -i "default" out.mpg
# Linux
ffmpeg -f v4l2 -list_formats all -i /dev/video0
ffmpeg -f v4l2 -framerate 30 -video_size 640x480 -i /dev/video0 output.mpgFrom hadoop summit Download VirtualBox and VirtualBox extensions from https://www.virtualbox.org/wiki/Downloads
Guide on getting the WebCam attached. Don't forget to enable USB on the VirtualBox image! https://tskamath.wordpress.com/2014/10/29/macbook-camera-virtualbox-2/
https://github.com/chipgarner/opencv3-webcam-docker
https://docs.docker.com/machine/drivers/virtualbox/ https://tskamath.wordpress.com/2014/10/29/macbook-camera-virtualbox-2/ https://trac.ffmpeg.org/wiki/Capture/Webcam